Solitary Confinement Tips (Solution)
Solitary Confinement: Tips (Solution)
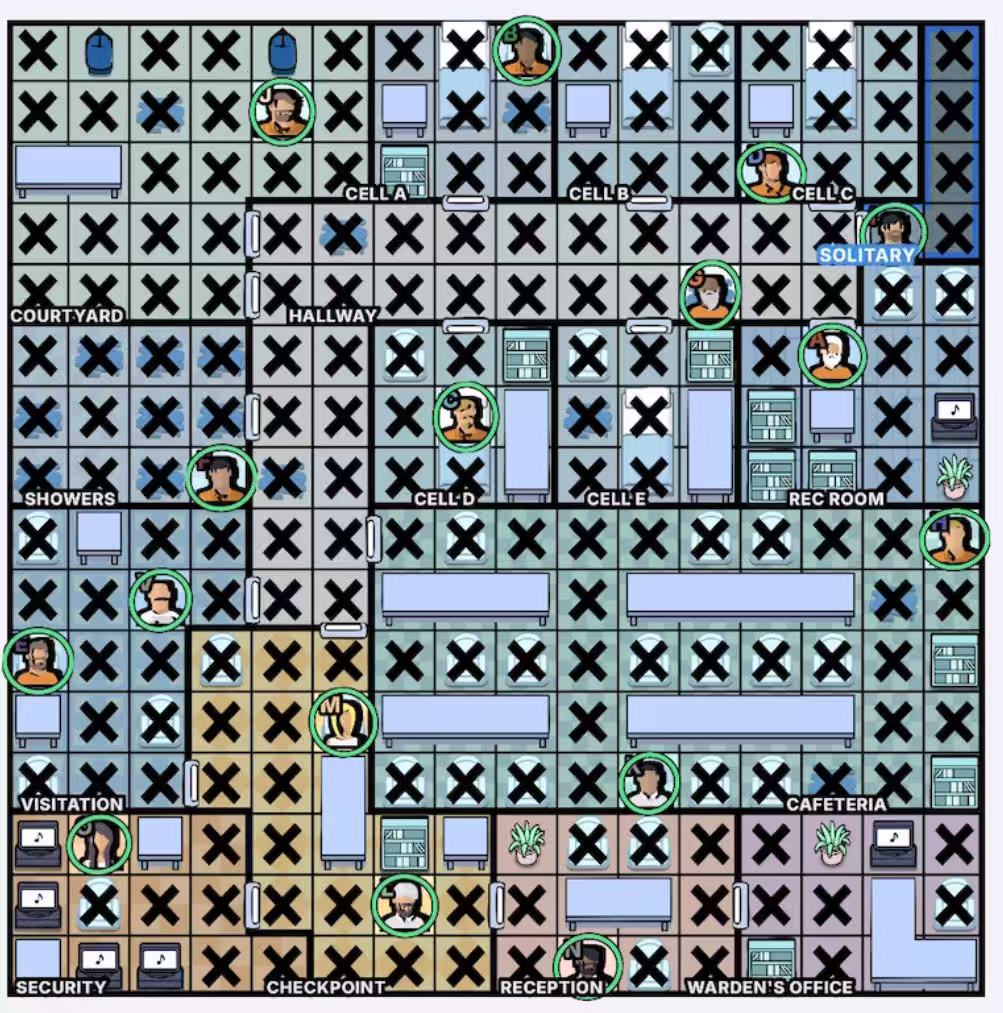
Do not jump to the solved board yet. Try a few more deductions first; if you are stuck, click View hint.
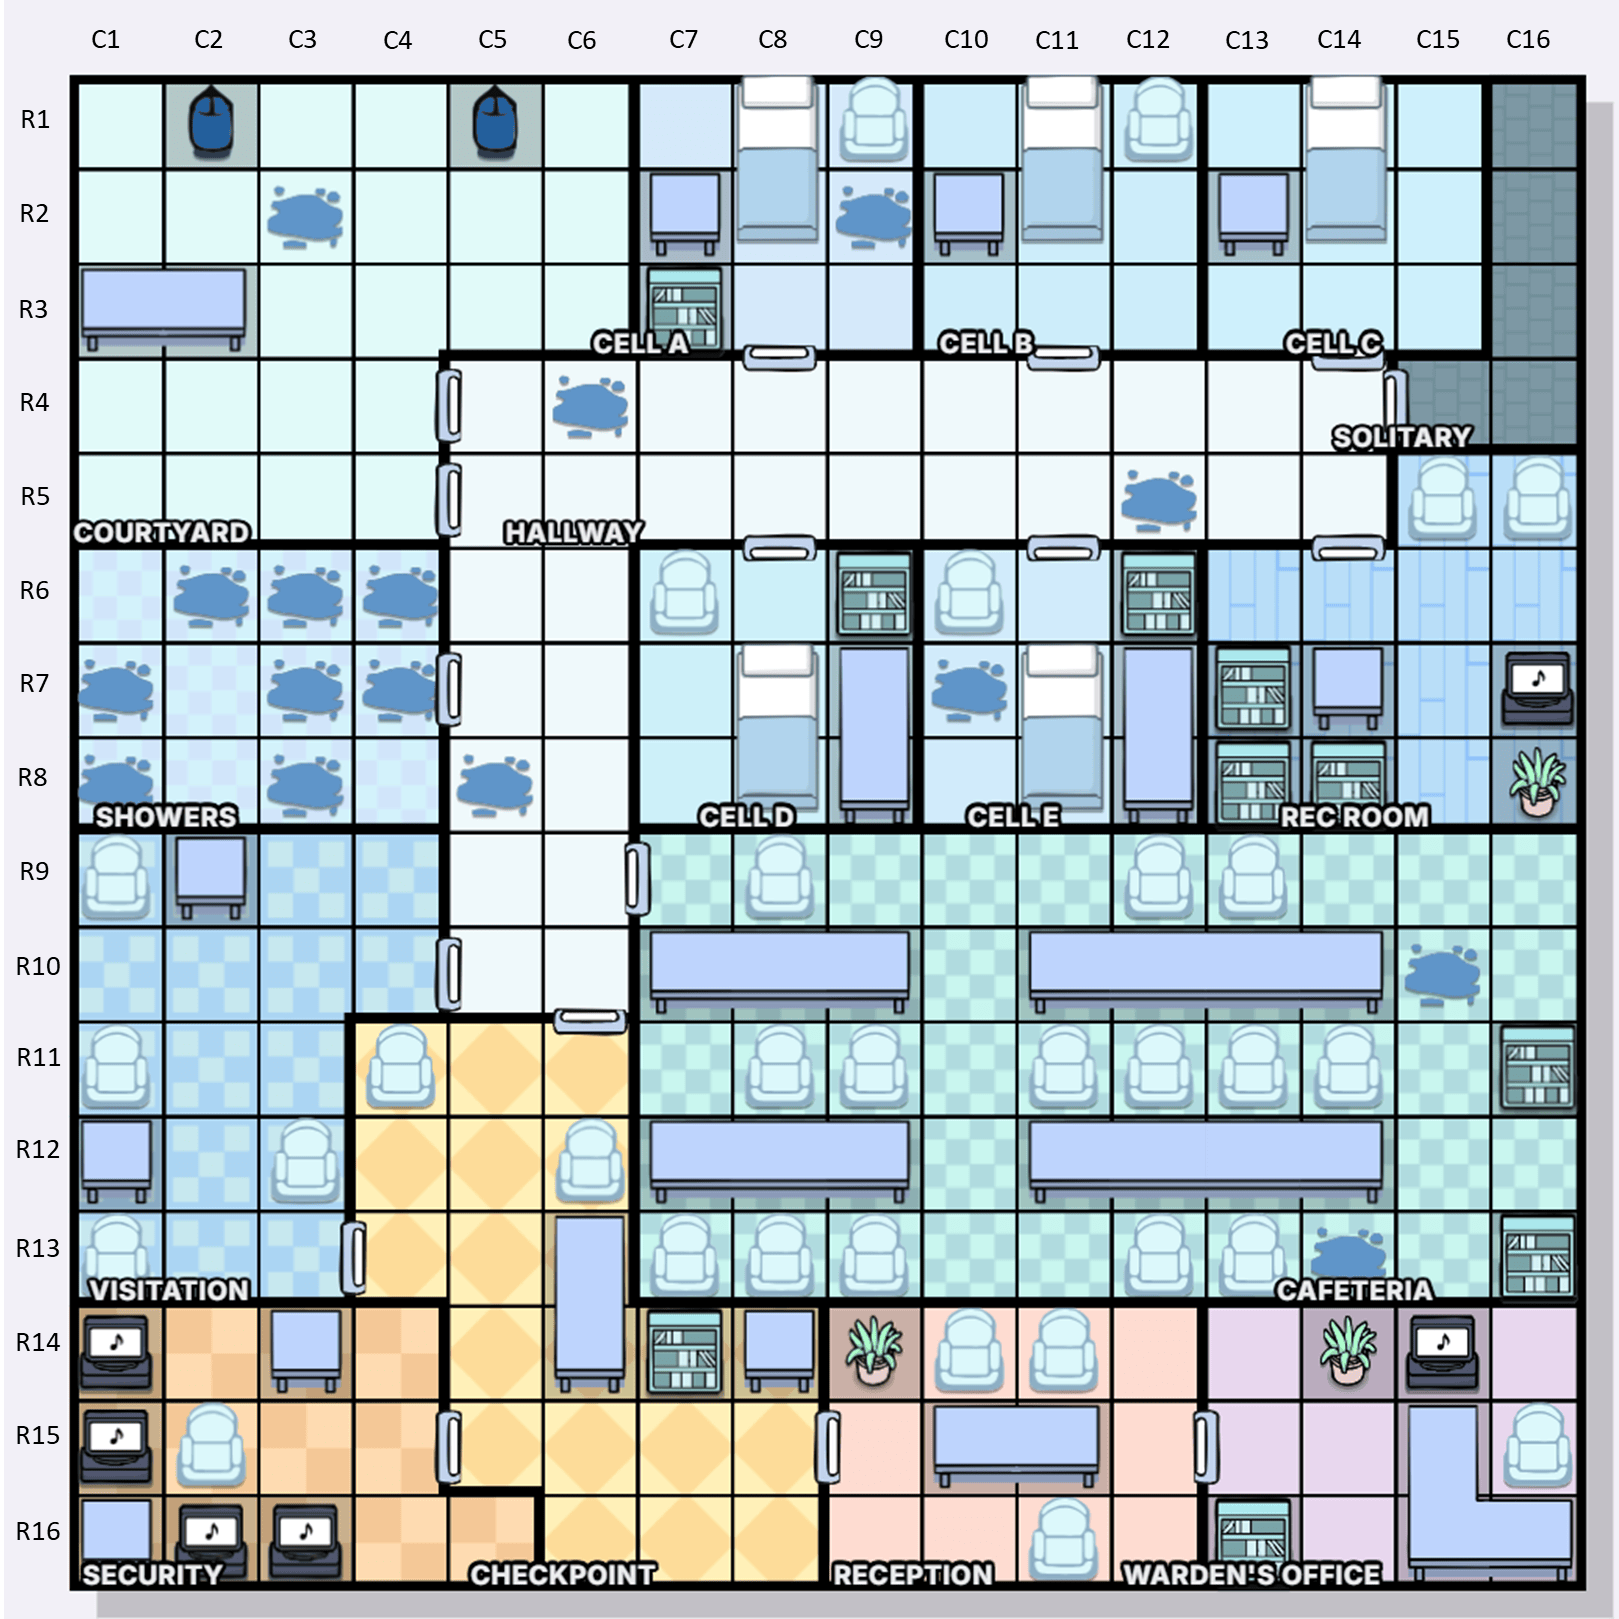
Coordinate note: R1 means row 1, C1 means column 1, and C1R1 is the upper-left cell. The CELL labels refer to the prison cells on the map.
1-4
Hint 1: narrow D down to two positions
- There are five CELL rooms. B occupies one of them, and B can only be in CELL A, CELL B, CELL D, or CELL E.
- Assume B is in CELL A or CELL B. Then B uses row R1 at C9R1 or C12R1. J's clue then leaves J only in row R2, at C2R2 or C5R2. With C's clue, C can only be on a bed in CELL D or CELL E. Because the CELL beside C is empty, D must be at C10R3 or C13R3.
- Now assume B is in CELL D or CELL E. B and C's clues then force C into CELL A, CELL B, or CELL C. Combining C and D's clues again leaves D with exactly two possible positions: C10R3 or C13R3.
- From the assumptions in steps 2 and 3, two conclusions are fixed. First, D must occupy one of two positions in row R3, C10R3 or C13R3, so all other positions in R3 can be crossed out. Second, rows R1 and R2 are occupied by J and either B or C, so H cannot be at C16R1 or C16R2. Combining that with A's clue, the person in SOLITARY can only be at C15R4 or C16R4, so the other R4 positions can be crossed out.
5-10
Hint 2: collapse the middle rows
- A's clue says A is two rows south of SOLITARY, so A is in row R6. That is a strong result: B can no longer be in CELL D or CELL E, so B must be at C9R1. C must be in CELL D or CELL E, in row R7 or R8.
- Combine F and G's clues. F has only three possible positions: C2R7, C2R8, and C4R8. Those are also in rows R7 or R8, so those two rows are occupied by C and F, and the other cells in those rows can be crossed out.
- Because of K's clue, the water puddles in CAFETERIA cannot be occupied. There are only two puddle positions on the map: C3R2 and C11R5. Row R2 is already occupied by J, so G is fixed at C11R5.
- Look at M and N's clues. In RECEPTION, only one remaining position can take N: C10R16. D can therefore only be at C13R3.
- Now inspect L's clue. With K and M's clues, L cannot be at C7R13. L also cannot share a room with a prisoner, so L is fixed at C7R15.
- O is beside the TV. Combining that with H's clue leaves O with only one position: C2R14.
11-16
Hint 3: finish the prison board
- From the board state, F is immediately fixed at C4R8, and J is fixed at C5R2.
- Continue with K's clue. The other person in a corner only has C16R9 left, and that is H's column, so H is at C16R9.
- SOLITARY now has only one remaining position. That position uses column C15, so all other remaining positions in C15 can be crossed out. Therefore K must be at C13R11.
- C also has only one remaining position: C8R7.
- L is already placed, but L's clue is not fully used. It also says L shares a space with another guard, which means CHECKPOINT. In the current board, that room only has C6R11 and C6R12 left, both in column C6. Therefore A is fixed at C14R6, and E is fixed at C1R11.
- Now the unique solution remains: M is on the seat, so M must be at C6R12. I is beside the door at C15R4, and V is at C3R10.
All hint layers are open. Use the solved board only to check your final placement.