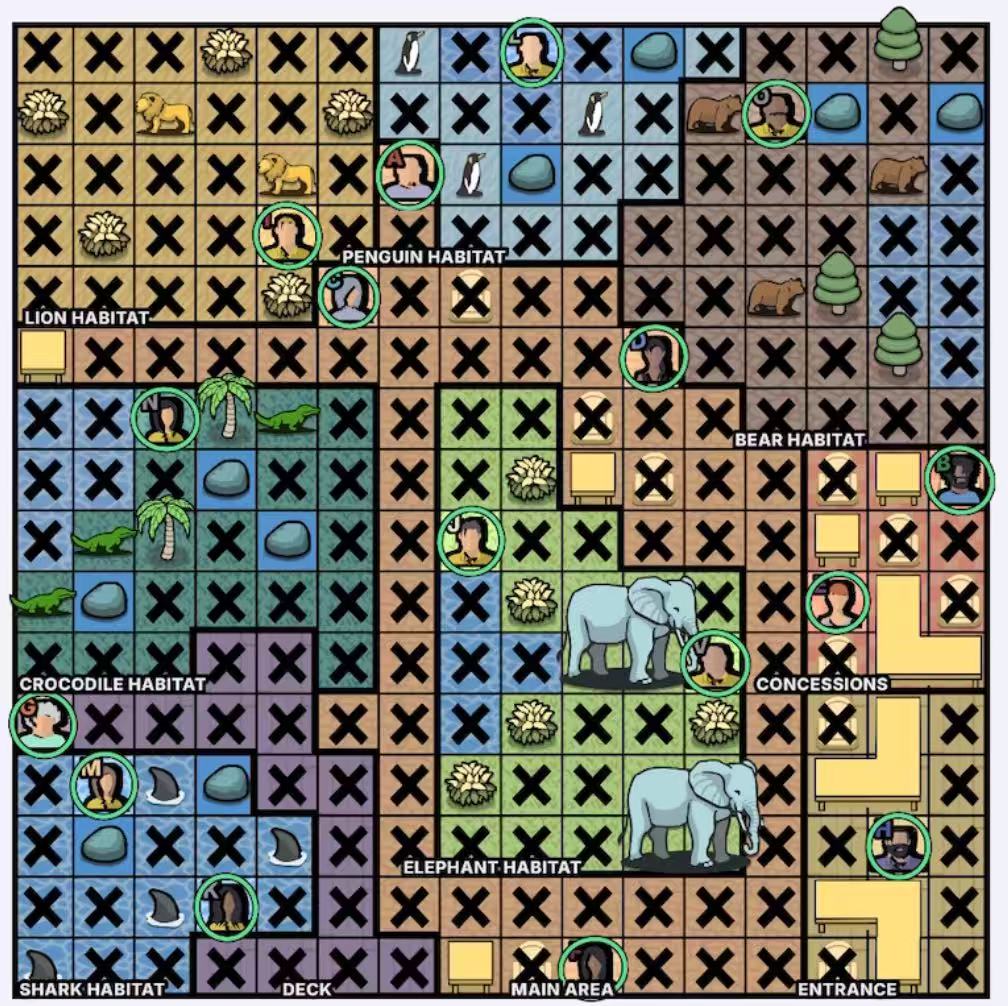
The Zoo Tips (Solution)
The Zoo: Tips (Solution)
Do not jump to the solved board yet. Try a few more deductions first; if you are stuck, click View hint.
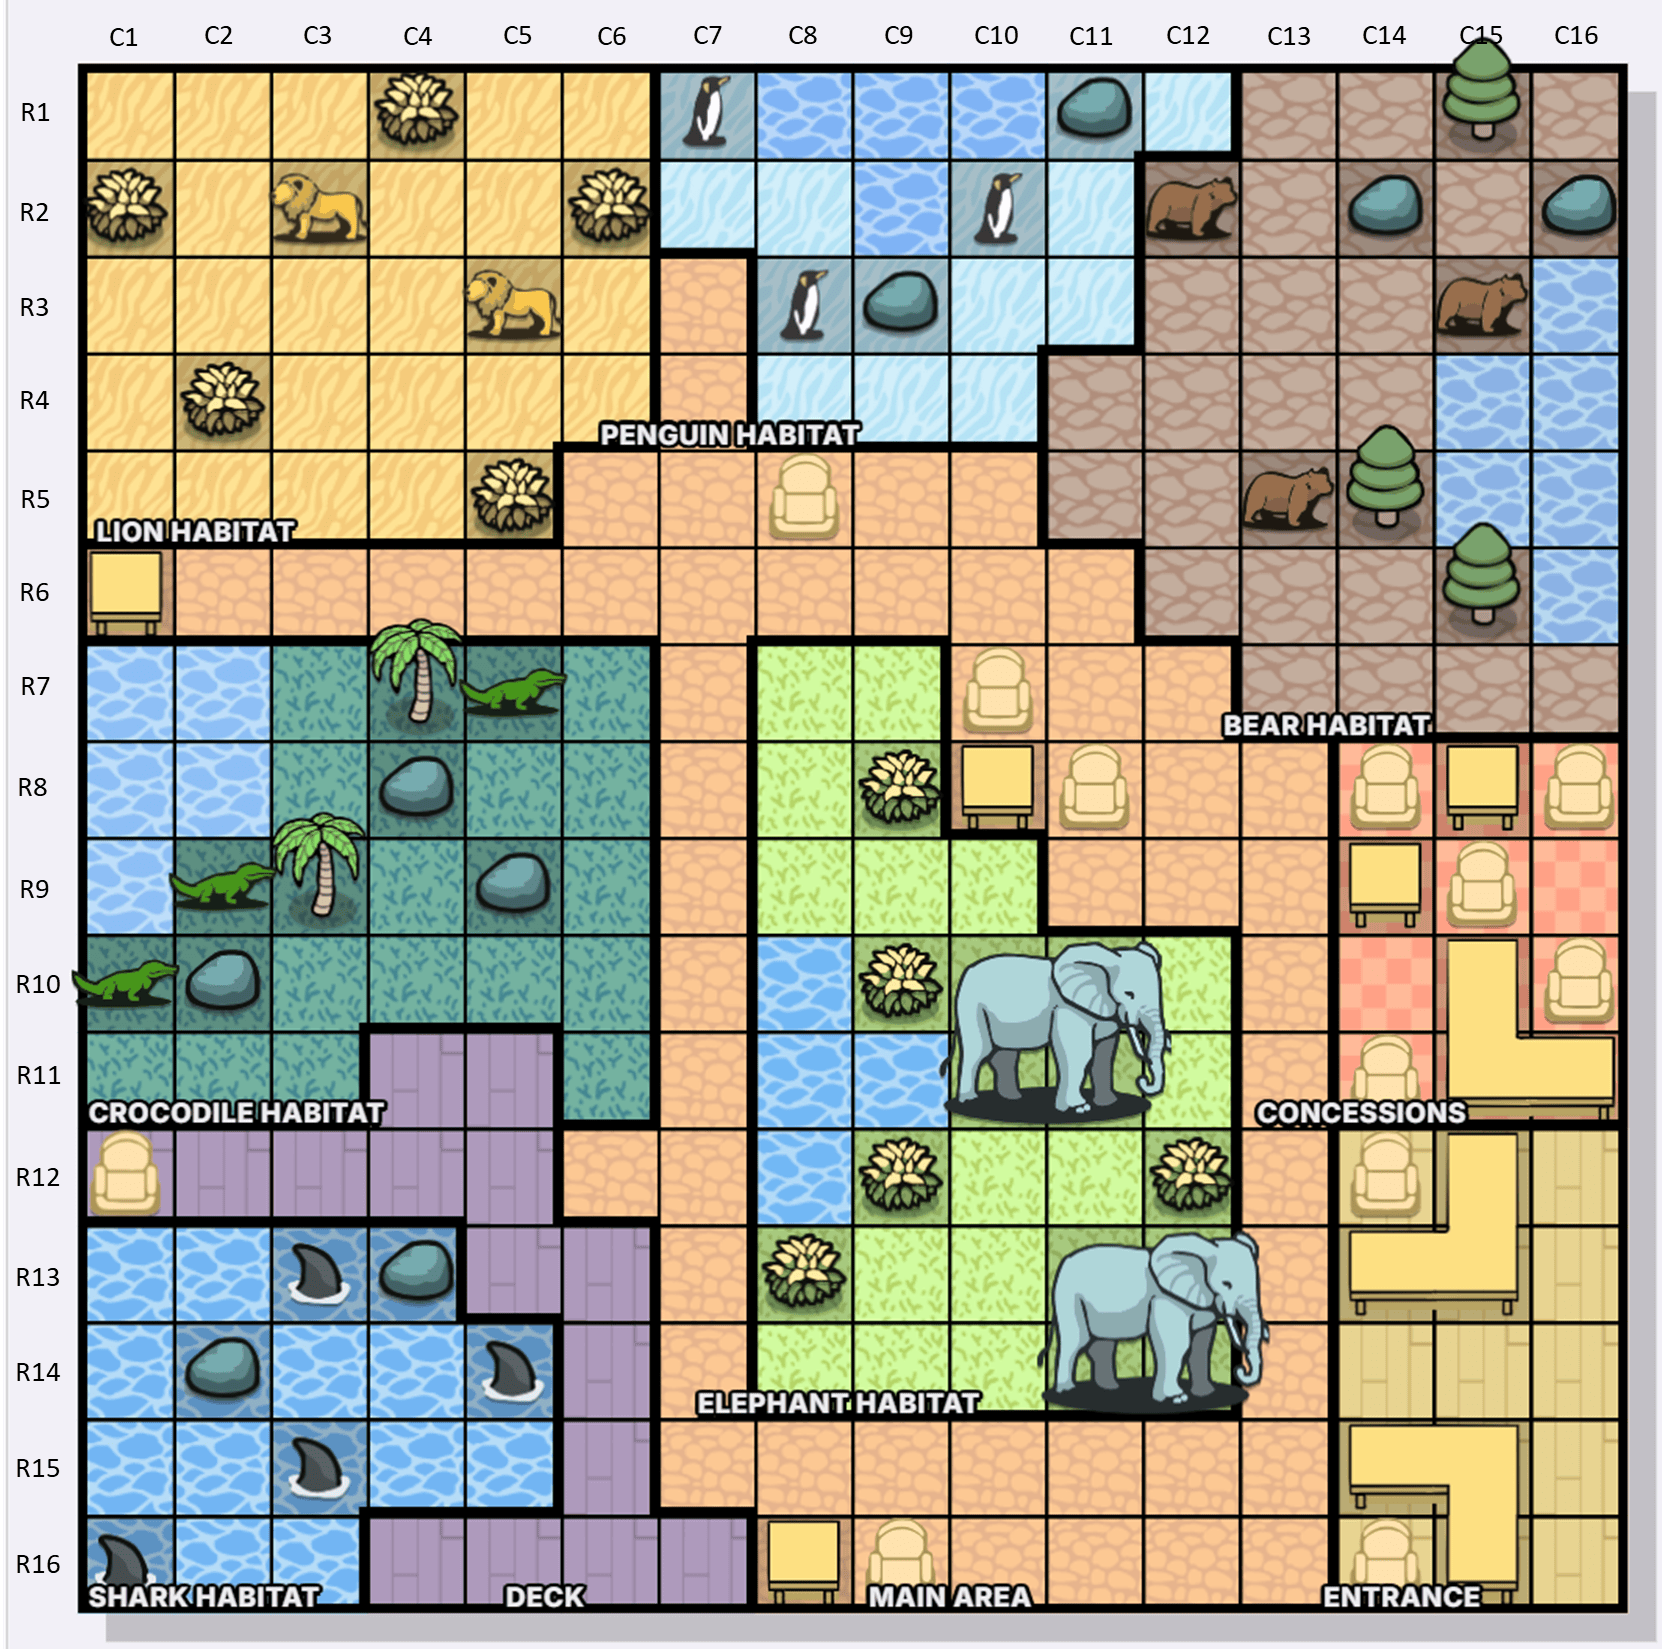
Coordinate note: R1 means row 1, C1 means column 1, and C1R1 is the upper-left cell. Zoo labels such as MAIN AREA, DECK, CONCESSIONS, ENTRANCE, BEAR, CROCODILE, SHARK, PENGUIN, and ELEPHANT refer to the map regions.
1-9
Hint 1: separate visitors from keepers
- Visitors cannot be in animal habitats, so visitors can only go to four regions: MAIN AREA, DECK, CONCESSIONS, and ENTRANCE.
- Scan the visitor clues. D is in MAIN AREA, B and another visitor are in CONCESSIONS, and G and H are each alone in a region. Therefore DECK and ENTRANCE each contain exactly one person, either G or H.
- From steps 1 and 2, C14, C15, and C16 are covered by the one ENTRANCE visitor and the two CONCESSIONS visitors. Therefore every BEAR cell in C14, C15, and C16 can be crossed out.
- Count the animal habitats and zookeepers. There are 6 habitats and 8 keepers. K and M are each alone in one habitat, so V and the murderer must share one habitat. Apart from V, K, and M, the remaining keepers are each alone in a separate habitat.
- N's clue says N can only be in CROCODILE. K and M are excluded from that region, so every CROCODILE cell in C2 can be crossed out.
- Now check J's clue: not in water, but beside water. CROCODILE is already occupied by N, and SHARK has no beside-water cells, so J can only be in PENGUIN or ELEPHANT. The beside-water positions are C8R2 and C8R9. Both use column C8, so the rest of C8 can be crossed out.
- Next inspect L's clue. L is in water but not beside an animal. Only three fitting positions remain: C9R1 in PENGUIN, C1R13 in SHARK, and C1R14 in SHARK.
- Make a test assumption from steps 6 and 7. If J were at C8R2, then L could only be in SHARK. Now use O's clue: O is beside a boulder. The only remaining boulder-adjacent region is BEAR, and the only cell is C13R2. But the assumed J already occupies row R2, so the assumption fails.
- That gives the first exact placement: J is at C8R9. From here, many positions will lock in quickly.
10-15
Hint 2: use the first placement to cascade
- Look at the board now. J occupies row R9, which leaves only C15R14 in column C15. From the earlier analysis, that position must be H, because H is alone in a region.
- G is fixed as well: G is at C1R12.
- Return to step 7. L's three possibilities now collapse to one answer: L is at C9R1.
- O beside the boulder is now visible: O is at C13R2.
- E beside the table is also visible: E is at C14R10. Likewise, B is at C16R8.
- N beside the tree can now be seen too: N is at C3R7.
16-21
Hint 3: finish the zoo board
- Continue with I and A's clues. I is beside an animal, and A is exactly one row north of I. The habitats BEAR, PENGUIN, and ELEPHANT already have keepers, so the remaining beside-animal positions are C2R13, C2R15, C4R3, C5R4, C5R15, and C6R3. The rows R3, R13, and R15 already have their north-adjacent rows occupied, so those rows are excluded. Therefore I is at C5R4, and A is a visitor at C7R3.
- Therefore K and M must be in SHARK. M is in column C2, and SHARK has only one remaining position outside C2, so K is at C4R15.
- C is one row north of D, so C and D must occupy two consecutive rows. The only consecutive rows left are R5 and R6. Now use F's clue: F is beside a chair, so F must be at C10R16.
- M's position is fixed: M is at C2R13.
- The remaining MAIN AREA positions in rows R5 and R6 now determine C and D: C is at C6R5, and D is at C11R6.
- Only one map position remains: V is at C12R11.
All hint layers are open. Use the solved board only to check your final placement.